How to Clean Laboratory Equipment
Properly cleaning your lab equipment between uses is vital. It prevents harmful chemicals and microorganisms from contaminating freezers, incubators and other components. Laboratory glassware — such as graduated cylinders, beakers, test tubes and flasks — warrants a thorough yet careful cleaning process to prevent scratches and abrasions on the glass.
From choosing the proper brush to selecting the right cleaner, you need to consider multiple factors before cleaning glass lab equipment. Learn how to clean lab glassware here.
Why Does Clean Lab Equipment Matter?
Cleaning and sanitizing your lab equipment after every use is important for the following reasons:
- It helps prevent contamination: Some test samples require storage in optimal environmental conditions to yield precise, reliable results. The environment should be isolated from other lab samples and free of dust particles to protect the stored sample from cross-contamination. Cleaning your laboratory equipment reduces the risk of cross-contamination that can alter the sample.
- It provides more accurate results: Clean medical equipment produces more reliable test results. Cleaning the apparatus — especially the glassware — after each use is essential. Dust particles, moisture and other remnants from previous tests can compromise the lab results, causing wasted energy and expenses.
- It maintains health and safety compliance: Multiple organizations — such as the Occupational Safety and Health Administration (OSHA) and Centers for Disease Control and Prevention (CDC) — have stringent laboratory safety regulations that include cleaning guidelines. Properly cleaning and sanitizing lab equipment is critical to comply with national health and safety standards. Failure to comply can lead to a license revocation or facility shutdown.
- It keeps your lab organized: Removing built-up debris and residue keeps lab glassware clean and sanitized, contributing to a cleaner and more organized workspace. An organized lab keeps equipment within reach so you can work at a consistent pace.
What Are The Tools Needed to Clean Lab Equipment
You'll need the following supplies to clean laboratory glassware:
- Brush: You should have a range of brush sizes handy for cleaning multiple types of laboratory glassware, including funnels, test tubes, beakers, pipettes and flasks. To protect glassware from scratches and abrasions, it's best to use brushes with plastic or wooden handles rather than metal. Additionally, try not to use an overly worn brush. It can scratch the glass if its bristles no longer prevent the spine from hitting the glass.
- Cleaner: Many detergents, soaps and cleaning powders are safe to use when washing laboratory glassware. A mildly abrasive and antibacterial cleaning product can offer better results for dirty glassware, provided the abrasion doesn't scratch the glass. Detergents like Alconox and Liquinox are common solutions, as they're designed for lab glassware.
- Personal protective equipment (PPE): It's important to wear PPE when cleaning lab equipment, especially when working with potentially hazardous substances. Be sure to wear heavy-duty and slip-resistant gloves, a lab coat, an apron and eye protection. A fume hood might also be necessary in some cases. You should enclose the cleaning area with a fume hood when working with toxic compounds or those with a boiling point under 120 degrees Celsius.
How to Clean Lab Equipment
Most lab equipment, including glassware, should be washed with warm water and detergent immediately after use to prevent residue buildup. For certain chemicals, such as insoluble organic solutions, soap and water may not be sufficient. These chemicals require additional rinsing with ethanol or acetone to ensure complete removal of any remaining deposits.
To effectively clean your lab equipment, it is recommended to adopt the following practices:
- Wipe down the exteriors of equipment on a daily basis.
- Perform a deep cleaning of lab equipment on a weekly basis.
- Consult your lab manager or refer to the owner's manual for specific cleaning processes for complex equipment.
When cleaning glass lab equipment, a general washing, scrubbing, rinsing, and drying process is typically suitable. Here are the basic steps to clean your glass lab equipment:
- Rinse the glassware with warm water to remove any immediate residue.
- Apply a suitable detergent and scrub the glassware to remove stubborn stains or deposits.
- Thoroughly rinse the glassware with water to eliminate any soap residue.
- If necessary, rinse the glassware with ethanol or acetone to ensure complete removal of any remaining deposits.
- Allow the glassware to air dry or use a suitable drying method before storing or reusing it.
- By following these cleaning procedures, you can effectively maintain the peak condition of your lab equipment, promoting accuracy and reliability in your experiments.
1. Sterilize the Equipment
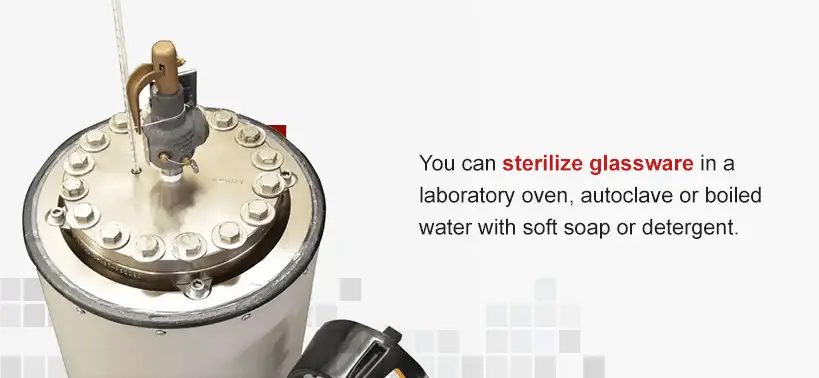
Some glassware — such as those contaminated with blood clots, viruses or spore-bearing bacteria — requires sterilization before cleaning. You can sterilize glassware in a laboratory oven, autoclave or boiled water with soft soap or detergent. Sterilize the glassware for about 30 minutes.

2. Wash and Scrub the Glassware Immediately After Use
Try to wash your glassware in hot water immediately after use to prevent stubborn residue formation. If you can't wash it right away, let it soak in hot water until you can clean it.
Start by gently scraping off any accumulated solids, then scrub the glassware with your brush and mild cleaner. You can move on to more robust techniques if this basic cleaning method doesn't work.
3. Soak the Glassware if Necessary
If there is residue in hard-to-reach places or a basic cleaner doesn't suffice, try soaking the glassware in a gentle solvent like xylene or acetone. Exceptionally dirty glassware might require even harsher cleaning strategies. However, these solutions involve concentrated acids or bases, making them highly corrosive. You must use them cautiously to avoid explosions or skin burns.
In some cases, insoluble residue on glassware can result from mildly acidic solutions, organic solvents or surfactant solutions. You can oxidize the contaminant to render it soluble. Several formulas — such as aqua regia — can oxidize contaminants from the glass surface. Aqua regia is an aqueous-based solution with a 3:1 ratio of hydrochloric and nitric acid.
4. Rinse and Dry
Lastly, you'll rinse and dry the glassware once it's fully clean. Lingering soap, detergent or fluid residue can interfere with test results the next time you use the glassware, so it's important to rinse it thoroughly.
Rinse the glassware with running tap water. Fill, shake and empty it at least six times. If you're rinsing with extremely hard water, run it through a reverse osmosis system or deionizer before using it.
Next, rinse the glassware in a large tub of high-purity or distilled water. Then, rinse each piece in high-purity water. Consider using specialized washer and dryer equipment for more fragile glassware pieces like pipettes.
After a thorough rinse, your glassware is ready to be dried. You can air-dry laboratory glassware by placing it in baskets facing downward or hanging it from wooden pegs. If using a basket, consider laying a clean cloth across the bottom to keep glassware mouths clean.
Find Laboratory Equipment Cleaning Products at Boekel Scientific
At Boekel Scientific, we specialize in medical equipment and research laboratory product design and manufacturing. Since 1868, our company has aimed to improve clients' lab operations — whether they work in blood banks, medical and diagnostic labs, research facilities or environmental labs.
You can find various laboratory equipment from our extensive selection, from ovens and incubators to blood banking and water bath equipment. Browse our inventory for durable, quality cleaning equipment for your laboratory.
If you have any questions about our products or need help finding a solution, you can contact our team anytime.


